Please Note: This article is written for users of the following Microsoft Excel versions: 97, 2000, 2002, and 2003. If you are using a later version (Excel 2007 or later), this tip may not work for you. For a version of this tip written specifically for later versions of Excel, click here: Copying Print Areas when Copying Worksheets.
Michael often copies worksheets within a workbook. This allows him to maintain the original worksheet and do his work on the newly copied worksheet. The one thing that doesn't copy from the source worksheet to the target worksheet is the print area. Michael would like a way to have the print area set in the newly copied worksheet after the copy is complete.
The answer depends on what you mean when you talk about copying worksheets. Let's say that you copy a worksheet in this manner:
This copies the contents of the source worksheet to the target worksheet, but it won't copy page settings, such as headers/footers, margins, and print areas. If you want to actually copy these items, you need to make sure you perform your copy using some variation of this procedure:
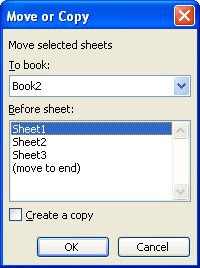
Figure 1. The Move or Copy dialog box.
The resulting copy of your worksheet includes any page settings, including any print areas defined in the worksheet.
ExcelTips is your source for cost-effective Microsoft Excel training. This tip (12099) applies to Microsoft Excel 97, 2000, 2002, and 2003. You can find a version of this tip for the ribbon interface of Excel (Excel 2007 and later) here: Copying Print Areas when Copying Worksheets.

Program Successfully in Excel! This guide will provide you with all the information you need to automate any task in Excel and save time and effort. Learn how to extend Excel's functionality with VBA to create solutions not possible with the standard features. Includes latest information for Excel 2024 and Microsoft 365. Check out Mastering Excel VBA Programming today!
Need to print several portions of a worksheet all on a single piece of paper? Here's an easy way you can get what you ...
Discover MoreExcel allows you to specify which portions of a worksheet should be printed when you send output to your printer. If you ...
Discover MoreSpend a lot of time defining print areas in your workbooks? You might benefit by adding a Set Print Area tool that makes ...
Discover MoreFREE SERVICE: Get tips like this every week in ExcelTips, a free productivity newsletter. Enter your address and click "Subscribe."
There are currently no comments for this tip. (Be the first to leave your comment—just use the simple form above!)
Got a version of Excel that uses the menu interface (Excel 97, Excel 2000, Excel 2002, or Excel 2003)? This site is for you! If you use a later version of Excel, visit our ExcelTips site focusing on the ribbon interface.
FREE SERVICE: Get tips like this every week in ExcelTips, a free productivity newsletter. Enter your address and click "Subscribe."
Copyright © 2026 Sharon Parq Associates, Inc.
 Please Note:
This article is written for users of the following Microsoft Excel versions: 97, 2000, 2002, and 2003. If you are using a later version (Excel 2007 or later), this tip may not work for you. For a version of this tip written specifically for later versions of Excel, click here:
Please Note:
This article is written for users of the following Microsoft Excel versions: 97, 2000, 2002, and 2003. If you are using a later version (Excel 2007 or later), this tip may not work for you. For a version of this tip written specifically for later versions of Excel, click here:
Comments