Written by Allen Wyatt (last updated October 20, 2018)
This tip applies to Excel 97, 2000, 2002, and 2003
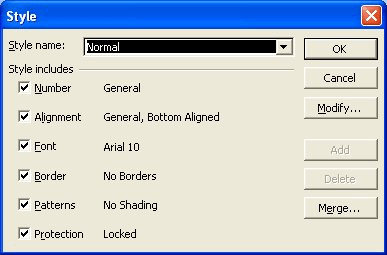
Once you have defined styles, you can apply them throughout your worksheet as you deem appropriate. Styles can be applied by following these steps:

Figure 1. The Style dialog box.
ExcelTips is your source for cost-effective Microsoft Excel training. This tip (2678) applies to Microsoft Excel 97, 2000, 2002, and 2003.

Solve Real Business Problems Master business modeling and analysis techniques with Excel and transform data into bottom-line results. This hands-on, scenario-focused guide shows you how to use the latest Excel tools to integrate data from multiple tables. Check out Microsoft Excel Data Analysis and Business Modeling today!
Custom styles can be a great help in formatting a worksheet. You may, at some point, want to get rid of all the custom ...
Discover MoreStyles can make your worksheet formatting easier and more consistent. Here's how to copy styles from an existing workbook ...
Discover MoreExcel allows you to define styles that help you display data in a consistent manner. When you no longer need a particular ...
Discover MoreFREE SERVICE: Get tips like this every week in ExcelTips, a free productivity newsletter. Enter your address and click "Subscribe."
There are currently no comments for this tip. (Be the first to leave your comment—just use the simple form above!)
Got a version of Excel that uses the menu interface (Excel 97, Excel 2000, Excel 2002, or Excel 2003)? This site is for you! If you use a later version of Excel, visit our ExcelTips site focusing on the ribbon interface.
FREE SERVICE: Get tips like this every week in ExcelTips, a free productivity newsletter. Enter your address and click "Subscribe."
Copyright © 2026 Sharon Parq Associates, Inc.
Comments