Mark noticed an odd thing when it comes to creating CSV files with Excel: the files are not always consistent in how they end each row in the output data. When he creates a CSV file that has, perhaps, 70 field (columns) of data and then views the CSV file in a text editor, he noticed that the records all contain carriage returns, but in different places. Some records have a string of commas representing empty fields, then terminate in the 'right' place; others end right after the last populated column; some have a few commas, but not enough for all the empty fields. Mark wondered why this occurs, and how he can get the CSV files to contain a consistent number of output fields.
One relatively easy way around the issue is to include a fully populated "dummy" field in your data, before you save as a CSV. For instance, if your table has 70 columns in it, at cell A71 enter a period. Copy the contents of this cell downward, for as many rows as you have in the table. When you then export the worksheet to CSV, Excel will include the dummy field, but more importantly will include the proper number of field delimiters (commas) before that final field in each record.
If you don't want the dummy field, you can try this:
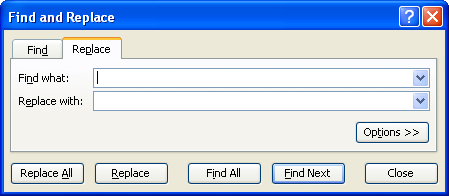
Figure 1. The Replace tab of the Find and Replace dialog box.
These steps replace all the empty cells with cells that contain a single space. You can then do the export to CSV and the proper number of fields will be exported for every single row.
Finally, if you routinely export large tables to CSV format, you may wish to create a macro that does the file creation for you. The following is just one example of the type of macro you can use:
Sub CreateCSV()
    Dim wkb As Workbook
    Dim wks As Worksheet
    Dim wksOri As Worksheet
    Dim iCols As Integer
    Dim lRow As Long
    Dim iCol As Integer
    Dim lRows As Long
    Dim sFilename As String

    Application.ScreenUpdating = False
    sFilename = "C:\test.csv"
    Set wksOri = ActiveSheet
    iCols = wksOri.Cells. _
        SpecialCells(xlCellTypeLastCell).Column
    lRows = wksOri.Cells. _
        SpecialCells(xlCellTypeLastCell).Row

    Set wkb = Workbooks.Add
    Set wks = wkb.Worksheets(1)

    For lRow = 1 To lRows
        For iCol = 1 To iCols
            With wks.Cells(lRow, 1)
                If iCol = 1 Then
                    .Value = wksOri.Cells(lRow, iCol).Text
                Else
                    .Value = .Value & "," & _
                        wksOri.Cells(lRow, iCol).Text
                End If
            End With
        Next
    Next

    Application.DisplayAlerts = False
    wkb.SaveAs FileName:=sFilename, _
        FileFormat:=xlCSV
    wkb.Close
    Application.DisplayAlerts = True
    wksOri.Parent.Activate
    Application.ScreenUpdating = True
    MsgBox sFilename & " saved"

    Set wks = Nothing
    Set wkb = Nothing
    Set wksOri = Nothing
End Sub
The macro creates a brand-new workbook and then "compiles" into column A of the workbook's first worksheet the information from the original worksheet. This data, which will contain a delimiter for every single field in the original, is then saved as a CSV file. Finally, the temporary workbook is deleted.
The path and filename of the CSV is hard-coded into the code (the sFileName variable), though it could be modified to have the code ask for a filename if desired.
ExcelTips is your source for cost-effective Microsoft Excel training. This tip (3068) applies to Microsoft Excel 97, 2000, 2002, and 2003.

Professional Development Guidance! Four world-class developers offer start-to-finish guidance for building powerful, robust, and secure applications with Excel. The authors show how to consistently make the right design decisions and make the most of Excel's powerful features. Check out Professional Excel Development today!
Need to get your data into a format that can be easily read by other programs? Chances are good that a simple CSV file ...
Discover MoreImporting a single file is easy. Importing a whole slew of files can be much more of a challenge.
Discover MoreSometimes, when importing data created by other programs, you may find that there is too much for Excel to handle. Here's ...
Discover MoreFREE SERVICE: Get tips like this every week in ExcelTips, a free productivity newsletter. Enter your address and click "Subscribe."
There are currently no comments for this tip. (Be the first to leave your comment—just use the simple form above!)
Got a version of Excel that uses the menu interface (Excel 97, Excel 2000, Excel 2002, or Excel 2003)? This site is for you! If you use a later version of Excel, visit our ExcelTips site focusing on the ribbon interface.
FREE SERVICE: Get tips like this every week in ExcelTips, a free productivity newsletter. Enter your address and click "Subscribe."
Copyright © 2026 Sharon Parq Associates, Inc.
Comments