Please Note: This article is written for users of the following Microsoft Excel versions: 97, 2000, 2002, and 2003. If you are using a later version (Excel 2007 or later), this tip may not work for you. For a version of this tip written specifically for later versions of Excel, click here: Printing Columns and Rows.
Brent asked if it was possible to print a single column and a single row from a worksheet on the same piece of paper. (His boss wanted to see just the "crossed" information.) Unfortunately, there is no intrinsic way within Excel to specify to print only a single column and a single row. If you select both the column and row you want to print, and then choose to print just the selection, Excel still treats them as separate selections and prints them in that way. There are a couple of workarounds, however.
The first approach is to simply "hide" the information you don't want to print by setting its font color to white. You can do that by following these general steps:
Another approach is to copy the row and column to a different worksheet. This is quick and easy to do using the keyboard (Ctrl+C to copy and Ctrl+V to paste), but there is a drawback. If the row or column you are copying contains formulas that rely on other areas of the worksheet, the copied data will not show the proper results. Thus, the best "cut and paste" approach would be as follows:
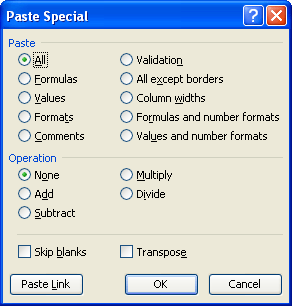
Figure 1. The Paste Special dialog box.
ExcelTips is your source for cost-effective Microsoft Excel training. This tip (3029) applies to Microsoft Excel 97, 2000, 2002, and 2003. You can find a version of this tip for the ribbon interface of Excel (Excel 2007 and later) here: Printing Columns and Rows.

Create Custom Apps with VBA! Discover how to extend the capabilities of Office 365 applications with VBA programming. Written in clear terms and understandable language, the book includes systematic tutorials and contains both intermediate and advanced content for experienced VB developers. Designed to be comprehensive, the book addresses not just one Office application, but the entire Office suite. Check out Mastering VBA for Microsoft Office 365 today!
Need to print more than one portion of your worksheet? If you use named ranges for the different ranges you want to ...
Discover MoreGot just a small amount of worksheet data to print out? It might look better on the printed page if you center it. Excel ...
Discover MoreExcel allows you to specify an area of your worksheet that should be printed. Here's how to "lock" that area so it cannot ...
Discover MoreFREE SERVICE: Get tips like this every week in ExcelTips, a free productivity newsletter. Enter your address and click "Subscribe."
There are currently no comments for this tip. (Be the first to leave your comment—just use the simple form above!)
Got a version of Excel that uses the menu interface (Excel 97, Excel 2000, Excel 2002, or Excel 2003)? This site is for you! If you use a later version of Excel, visit our ExcelTips site focusing on the ribbon interface.
FREE SERVICE: Get tips like this every week in ExcelTips, a free productivity newsletter. Enter your address and click "Subscribe."
Copyright © 2026 Sharon Parq Associates, Inc.
 Please Note:
This article is written for users of the following Microsoft Excel versions: 97, 2000, 2002, and 2003. If you are using a later version (Excel 2007 or later), this tip may not work for you. For a version of this tip written specifically for later versions of Excel, click here:
Please Note:
This article is written for users of the following Microsoft Excel versions: 97, 2000, 2002, and 2003. If you are using a later version (Excel 2007 or later), this tip may not work for you. For a version of this tip written specifically for later versions of Excel, click here:
Comments