Please Note: This article is written for users of the following Microsoft Excel versions: 97, 2000, 2002, and 2003. If you are using a later version (Excel 2007 or later), this tip may not work for you. For a version of this tip written specifically for later versions of Excel, click here: Getting Rid of Non-Printing Characters Intelligently.
If you work with files that originate from a non-Excel source, you can sometimes end up with characters in your cells that Excel doesn't know how to display properly. For instance, you may have a comma-delimited text file generated by your company's accounting software, and you load the file into Excel. In some cells you may notice that there are small boxes. These represent non-printing characters. Excel displays the small boxes so that you know the character is there, even though it cannot be displayed or printed.
To get rid of these characters you an try to use the Find and Replace feature of Excel. Try these steps:
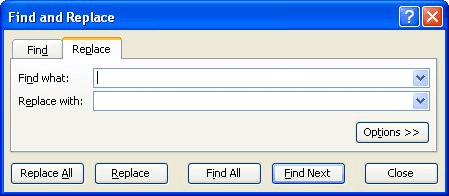
Figure 1. The Replace tab of the Find and Replace dialog box.
This approach may or may not work, depending mostly on Excel and whether it let you accurately copy the offending character in step 1. If it does work, then you have learned a valuable technique for getting rid of the bad characters. If it doesn't work, then you should try a different approach.
One thing to try is to use Word in your "clean up" operations. Copy the data from Excel to a Word document (paste it as regular text), and then replace the offending characters. You can then paste the data back into Excel. Some people report that they get exactly the results they want by using this round-trip approach to working with the data.
You can, of course, use a macro to get rid of the offending characters. It isn't too difficult to create your own version of the CLEAN worksheet function that, instead of simply removing non-printing characters, replaces them with spaces. Consider the following example macro:
Function ReplaceClean1(sText As String, Optional sSubText As String = " ")
    Dim J As Integer
    Dim vAddText

    vAddText = Array(Chr(129), Chr(141), Chr(143), Chr(144), Chr(157))
    For J = 1 To 31
        sText = Replace(sText, Chr(J), sSubText)
    Next
    For J = 0 To UBound(vAddText)
        sText = Replace(sText, vAddText(J), sSubText)
    Next
    ReplaceClean1 = sText
End Function
You use this function in the following manner within your worksheet:
=ReplaceClean1(B14)
In this case, all non-printing characters in cell B14 are replaced with a space. If you want the characters replaced with something else, just provide the text to replace with. The following example replaces the non-printing characters with a dash:
=ReplaceClean1(A1,"-")
The following usage simply removes the non-printing characters, the same as the CLEAN function:
=ReplaceClean1(A1,"")
If you look back at the ReplaceClean1 macro presented earlier, you see that it uses the Replace function. This VBA function is not available in all the versions of VBA used with the different versions of Excel. If you try the macro and you get an error on one of the lines that use the Replace function, then use this version of the ReplaceClean macro instead:
Function ReplaceClean2(sText As String, Optional sSubText As String = " ")
    Dim J As Integer
    Dim vAddText
    Dim aWF As WorksheetFunction
    Set aWF = Application.WorksheetFunction

    vAddText = Array(Chr(129), Chr(141), Chr(143), Chr(144), Chr(157))
    For J = 1 To 31
        sText = aWF.Substitute(sText, Chr(J), sSubText)
    Next
    For J = 0 To UBound(vAddText)
        sText = aWF.Substitute(sText, vAddText(J), sSubText)
    Next
    ReplaceClean2 = sText
    Set aWF = Nothing
End Function
Note:
ExcelTips is your source for cost-effective Microsoft Excel training. This tip (2947) applies to Microsoft Excel 97, 2000, 2002, and 2003. You can find a version of this tip for the ribbon interface of Excel (Excel 2007 and later) here: Getting Rid of Non-Printing Characters Intelligently.

Best-Selling VBA Tutorial for Beginners Take your Excel knowledge to the next level. With a little background in VBA programming, you can go well beyond basic spreadsheets and functions. Use macros to reduce errors, save time, and integrate with other Microsoft applications. Fully updated for the latest version of Office 365. Check out Microsoft 365 Excel VBA Programming For Dummies today!
When you copy a formula from one cell to another, Excel normally adjusts the cell references within the formula so they ...
Discover MoreWhen creating a workbook, you may need to make changes on one worksheet and have those edits appear on the same cells in ...
Discover MoreWhen you are copying a cell from one place to another (perhaps even to a different worksheet), you may not want to copy ...
Discover MoreFREE SERVICE: Get tips like this every week in ExcelTips, a free productivity newsletter. Enter your address and click "Subscribe."
There are currently no comments for this tip. (Be the first to leave your comment—just use the simple form above!)
Got a version of Excel that uses the menu interface (Excel 97, Excel 2000, Excel 2002, or Excel 2003)? This site is for you! If you use a later version of Excel, visit our ExcelTips site focusing on the ribbon interface.
FREE SERVICE: Get tips like this every week in ExcelTips, a free productivity newsletter. Enter your address and click "Subscribe."
Copyright © 2026 Sharon Parq Associates, Inc.
 Please Note:
This article is written for users of the following Microsoft Excel versions: 97, 2000, 2002, and 2003. If you are using a later version (Excel 2007 or later), this tip may not work for you. For a version of this tip written specifically for later versions of Excel, click here:
Please Note:
This article is written for users of the following Microsoft Excel versions: 97, 2000, 2002, and 2003. If you are using a later version (Excel 2007 or later), this tip may not work for you. For a version of this tip written specifically for later versions of Excel, click here:
Comments