Please Note: This article is written for users of the following Microsoft Excel versions: 97, 2000, 2002, and 2003. If you are using a later version (Excel 2007 or later), this tip may not work for you. For a version of this tip written specifically for later versions of Excel, click here: Adding a File Path and Filename.
Margo wants to insert a file path and filename in an Excel worksheet. She wants to be able to insert the information in either a cell or into the header/footer. This is rather easy to do in Excel.
To insert the file path and filename into a cell, you use the CELL worksheet function in the following manner:
=CELL("filename")
This formula returns the entire path, filename, and tab name of the current worksheet, like this:
E:\My Data\Excel\[Budget.xls]Sheet1
If you want to strip out the brackets and the sheet name, you can use the following variation on the formula:
=SUBSTITUTE(LEFT(CELL("filename"),FIND("]",CELL("filename"))-1),"[","")
The LEFT function gets rid of everything from the right bracket to the end of the string, while the SUBSTITUTE function gets rid of the left bracket.
Putting a path and filename into a header or footer is easy:
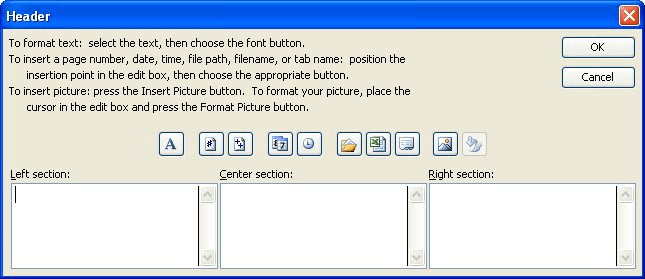
Figure 1. The Header dialog box.
&[Path]&[File]
When you print the worksheet, Excel replaces the codes in step 5 with the path name and the file name of the workbook, respectively.
If you are using Excel 97 or Excel 2000, then the above steps won't work. Instead, you need to use a macro to insert the path and filename:
Sub DoFullPath()
    ActiveSheet.PageSetup.CenterFooter = _
      ActiveWorkbook.FullName
End Sub
This macro will also work in later versions of Excel. To specify a different place for the path and filename, simply change CenterFooter to another location (such as LeftFooter, RightFooter, LeftHeader, CenterHeader, or RightHeader). If you decide to use the macro approach, you will need to remember to run it every time that you change either the workbook's filename (you use Save As), or you change the place where the workbook is stored on your disk.
Note:
ExcelTips is your source for cost-effective Microsoft Excel training. This tip (2875) applies to Microsoft Excel 97, 2000, 2002, and 2003. You can find a version of this tip for the ribbon interface of Excel (Excel 2007 and later) here: Adding a File Path and Filename.

Program Successfully in Excel! This guide will provide you with all the information you need to automate any task in Excel and save time and effort. Learn how to extend Excel's functionality with VBA to create solutions not possible with the standard features. Includes latest information for Excel 2024 and Microsoft 365. Check out Mastering Excel VBA Programming today!
As you work with a workbook (particularly one that contains macros) you may notice that the workbook size can become ...
Discover MoreWorkbooks can get rather large rather quickly. If you think your workbook has gotten too big too fast, here are some ...
Discover MoreWouldn't it be nice to have a single command that would save each of you open workbooks, all at once? It's easy to do ...
Discover MoreFREE SERVICE: Get tips like this every week in ExcelTips, a free productivity newsletter. Enter your address and click "Subscribe."
There are currently no comments for this tip. (Be the first to leave your comment—just use the simple form above!)
Got a version of Excel that uses the menu interface (Excel 97, Excel 2000, Excel 2002, or Excel 2003)? This site is for you! If you use a later version of Excel, visit our ExcelTips site focusing on the ribbon interface.
FREE SERVICE: Get tips like this every week in ExcelTips, a free productivity newsletter. Enter your address and click "Subscribe."
Copyright © 2026 Sharon Parq Associates, Inc.
 Please Note:
This article is written for users of the following Microsoft Excel versions: 97, 2000, 2002, and 2003. If you are using a later version (Excel 2007 or later), this tip may not work for you. For a version of this tip written specifically for later versions of Excel, click here:
Please Note:
This article is written for users of the following Microsoft Excel versions: 97, 2000, 2002, and 2003. If you are using a later version (Excel 2007 or later), this tip may not work for you. For a version of this tip written specifically for later versions of Excel, click here:
Comments