Please Note: This article is written for users of the following Microsoft Excel versions: 97, 2000, 2002, and 2003. If you are using a later version (Excel 2007 or later), this tip may not work for you. For a version of this tip written specifically for later versions of Excel, click here: Automatic Row Height for Wrapped Text.
Written by Allen Wyatt (last updated March 9, 2019)
This tip applies to Excel 97, 2000, 2002, and 2003
Jordan formatted some cells in his worksheet to wrap text within them. Even though the text in the cells wraps, Excel won't automatically adjust the row height to show all the wrapped text. Jordan wonders if there is a way to "reset" the row so that Excel will adjust its height based on the text being wrapped within the cells.
By default, when you wrap text within a cell, Excel automatically adjusts row height so that all the text in the cell is visible. There are only two exceptions to this default:
In Jordan's case, there are no merged cells in the problem row. This leaves us with the second exception—it would appear that the height of the row in which the cell is located was explicitly set before wrapping was turned on in some of the row's cells.
In this case, the solution is simple: Reset the row height. There are actually a couple of ways you can do this. First, you could select the row and then double-click the "boundary" between the row and an adjacent row. With the row selected, take a look at the row header, to the left of column A. This area contains a row number, and the "boundary" you need to double-click is between this row number and the next row number.
It can be a bit tricky to get the mouse pointer in the correct location to do the double-clicking, so an approach I prefer is to select the row and simply choose Format | Row | Autofit. This allows Excel to determine the appropriate row height based on the contents of the row. If a cell in the row has wrapping turned on, then the row height will automatically adjust to display the information in the cell.
You can find additional information about this issue in the Microsoft Knowledge Base:
http://support.microsoft.com/kb/149663
If you have quite a few rows that contain cells with wrapping turned on, and the height of none of the rows is adjusting, then you may be interested in a quick little macro that can do the adjustment for you:
Sub AutofitRows()
    For Each CL In UsedRange
        If CL.WrapText Then CL.Rows.AutoFit
    Next
End Sub
The macro steps through all the cells in a worksheet, and if the cell has wrapping turned on, it sets the AutoFit property of the row in which the cell is located.
Note:
ExcelTips is your source for cost-effective Microsoft Excel training. This tip (10734) applies to Microsoft Excel 97, 2000, 2002, and 2003. You can find a version of this tip for the ribbon interface of Excel (Excel 2007 and later) here: Automatic Row Height for Wrapped Text.

Professional Development Guidance! Four world-class developers offer start-to-finish guidance for building powerful, robust, and secure applications with Excel. The authors show how to consistently make the right design decisions and make the most of Excel's powerful features. Check out Professional Excel Development today!
When you enter information into a row on a worksheet, Excel automatically adjusts the height of the row based on what you ...
Discover MoreWhen building a worksheet, you may need to hide some of the rows or unhide other, previously hidden, rows. It's easy to ...
Discover MoreAdjusting the height of a row or range of rows is relatively easy in Excel. How do you adjust the height of those same ...
Discover MoreFREE SERVICE: Get tips like this every week in ExcelTips, a free productivity newsletter. Enter your address and click "Subscribe."
2022-05-25 15:55:12
Brendan Kelley
Hi, this doesnt work. I get a type mistmatch after running the macro.
2021-12-21 10:19:58
Sara Cosham
Hi,
Do you put this formula in the worksheet, ThisWorkbook or a Module (I have tried all three, and it's not working for me! (I get an error when in Module, with the second line being highlighted))?
2021-08-18 16:59:05
Maria Mirabelli
Hi. This issue as been ongoing for years. What I see on my excel screen does not match the Print Preview or the PDF. This is my excel screen (see Figure 1 below) and this is the print preview/PDF view (see Figure 2 below) .
The print preview view cuts off the bottom of the text and you have to manually adjust the page. Yes, I used autofit row height and I have also manually double clicked the row heights on the left side of the screen. I am using the Arial font in size 8. The only way to fix this is to change the font size to 10 but my document will be over 1500 pages if I use the 10 font. Is there any way to make it 8 font and have the row autofit (without me having to go through 1100 rows and manually fix them)? Please help
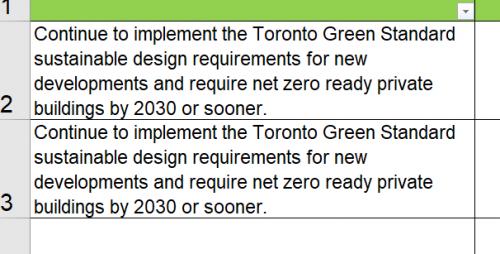
Figure 1. Excel Worksheet View
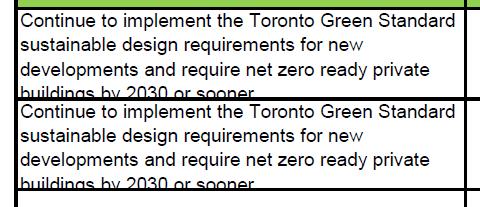
Figure 2. Excel Print Preview and PDF view
2020-06-26 06:54:46
Amit
The "Autofit Row Height" (ARH) option does not work, if the cell contains a formula.
For example, whenever I enter some data in Sheet1, I am using a formula in Sheet2 for it to copy the content, but the ARH works in Sheet1 but not in Sheet2. Is there a workaround to this please.
I am using Excel 365
Thanks in advance
Got a version of Excel that uses the menu interface (Excel 97, Excel 2000, Excel 2002, or Excel 2003)? This site is for you! If you use a later version of Excel, visit our ExcelTips site focusing on the ribbon interface.
FREE SERVICE: Get tips like this every week in ExcelTips, a free productivity newsletter. Enter your address and click "Subscribe."
Copyright © 2026 Sharon Parq Associates, Inc.
 Please Note:
This article is written for users of the following Microsoft Excel versions: 97, 2000, 2002, and 2003. If you are using a later version (Excel 2007 or later), this tip may not work for you. For a version of this tip written specifically for later versions of Excel, click here:
Please Note:
This article is written for users of the following Microsoft Excel versions: 97, 2000, 2002, and 2003. If you are using a later version (Excel 2007 or later), this tip may not work for you. For a version of this tip written specifically for later versions of Excel, click here:
Comments