Please Note: This article is written for users of the following Microsoft Excel versions: 97, 2000, 2002, and 2003. If you are using a later version (Excel 2007 or later), this tip may not work for you. For a version of this tip written specifically for later versions of Excel, click here: Creating Scenarios.
Written by Allen Wyatt (last updated January 17, 2026)
This tip applies to Excel 97, 2000, 2002, and 2003
You already know that Excel provides the ability to play "what if" with your worksheets. As an adjunct to this capability, Excel provides the Scenario Manager, which allows you to save different data scenarios. Using this tool you can save different variables for your sheet and call them up quickly and easily.
As an example, let's suppose that you work for Talbot Industries, and you have been charged with developing a profitability analysis for a new product—the Potato Chip Peeler. You develop your sheet, taking into account all the appropriate information. However, you know that it is prudent at your company to actually prepare three forecasts. The first would be the worst-case scenario, the second is the most-likely scenario, and the final is the best-case scenario.
To save a scenario, follow these steps:

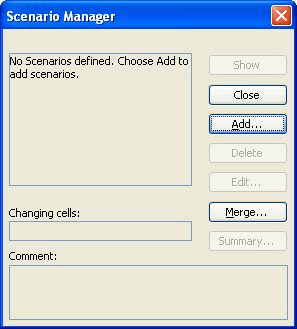
Figure 1. The Scenario Manager dialog box.

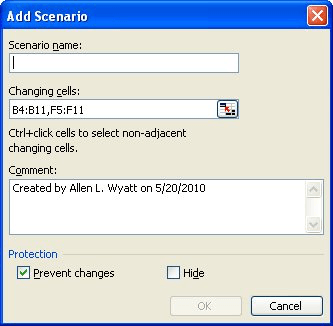
Figure 2. The Add Scenario dialog box.
Once you have a scenario saved, you can make changes to your workbook and save your changed figures under a different scenario.
ExcelTips is your source for cost-effective Microsoft Excel training. This tip (2860) applies to Microsoft Excel 97, 2000, 2002, and 2003. You can find a version of this tip for the ribbon interface of Excel (Excel 2007 and later) here: Creating Scenarios.

Excel Smarts for Beginners! Featuring the friendly and trusted For Dummies style, this popular guide shows beginners how to get up and running with Excel while also helping more experienced users get comfortable with the newest features. Check out Excel 2019 For Dummies today!
When you create and save scenarios in a workbook, you can later pull them out and display them. Here's how to do it.
Discover MoreOnce a scenario is defined and saved, you can later revisit the values you created for the scenario and modify them. ...
Discover MoreIf you've defined a variety of scenarios for your workbook, Excel can provide a handy way to compare the effects of those ...
Discover MoreFREE SERVICE: Get tips like this every week in ExcelTips, a free productivity newsletter. Enter your address and click "Subscribe."
There are currently no comments for this tip. (Be the first to leave your comment—just use the simple form above!)
Got a version of Excel that uses the menu interface (Excel 97, Excel 2000, Excel 2002, or Excel 2003)? This site is for you! If you use a later version of Excel, visit our ExcelTips site focusing on the ribbon interface.
FREE SERVICE: Get tips like this every week in ExcelTips, a free productivity newsletter. Enter your address and click "Subscribe."
Copyright © 2026 Sharon Parq Associates, Inc.
Comments