Please Note: This article is written for users of the following Microsoft Excel versions: 97, 2000, 2002, and 2003. If you are using a later version (Excel 2007 or later), this tip may not work for you. For a version of this tip written specifically for later versions of Excel, click here: Setting Row Height.
Written by Allen Wyatt (last updated September 14, 2019)
This tip applies to Excel 97, 2000, 2002, and 2003
Excel normally sets the height of rows within your worksheet to reflect the size of the largest font used on the row. You can, however, adjust the height of the row to any size desired. For instance, you might want to add additional space before a row. Rather than insert a blank row, you can increase the height of the row, so it has blank space before it.
The easiest method for adjusting row height is to use the mouse. All you need to do is move the mouse pointer into the row header area (the gray area at the left of the row). When you move the pointer, so it is over a dividing line between rows, it changes shape to a double-headed arrow. When the mouse pointer is this shape, you can click on the left mouse button, hold it down, and drag the border to a new position. When you release the mouse button, the row is resized to the new height.
You can also adjust row height in this manner:
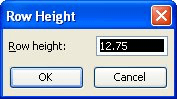
Figure 1. The Row Height dialog box.
The value shown in the dialog box (step 4) represents the current height of the selected row, in points. A point is equal to approximately 1/72 inch; it is the measurement unit used for fonts.
ExcelTips is your source for cost-effective Microsoft Excel training. This tip (2756) applies to Microsoft Excel 97, 2000, 2002, and 2003. You can find a version of this tip for the ribbon interface of Excel (Excel 2007 and later) here: Setting Row Height.

Solve Real Business Problems Master business modeling and analysis techniques with Excel and transform data into bottom-line results. This hands-on, scenario-focused guide shows you how to use the latest Excel tools to integrate data from multiple tables. Check out Microsoft Excel Data Analysis and Business Modeling today!
Adjusting the height of a row or range of rows is relatively easy in Excel. How do you adjust the height of those same ...
Discover MoreWhen you format a cell so that the information within it can wrap to multiple lines, you may be surprised if Excel ...
Discover MoreExcel allows you to easily hide rows in a worksheet, so their contents are not visible. Figuring out how to detect where ...
Discover MoreFREE SERVICE: Get tips like this every week in ExcelTips, a free productivity newsletter. Enter your address and click "Subscribe."
There are currently no comments for this tip. (Be the first to leave your comment—just use the simple form above!)
Got a version of Excel that uses the menu interface (Excel 97, Excel 2000, Excel 2002, or Excel 2003)? This site is for you! If you use a later version of Excel, visit our ExcelTips site focusing on the ribbon interface.
FREE SERVICE: Get tips like this every week in ExcelTips, a free productivity newsletter. Enter your address and click "Subscribe."
Copyright © 2025 Sharon Parq Associates, Inc.
 Please Note:
This article is written for users of the following Microsoft Excel versions: 97, 2000, 2002, and 2003. If you are using a later version (Excel 2007 or later), this tip may not work for you. For a version of this tip written specifically for later versions of Excel, click here:
Please Note:
This article is written for users of the following Microsoft Excel versions: 97, 2000, 2002, and 2003. If you are using a later version (Excel 2007 or later), this tip may not work for you. For a version of this tip written specifically for later versions of Excel, click here:
Comments