Please Note: This article is written for users of the following Microsoft Excel versions: 97, 2000, 2002, and 2003. If you are using a later version (Excel 2007 or later), this tip may not work for you. For a version of this tip written specifically for later versions of Excel, click here: Pulling Filenames into a Worksheet.
Carol has a directory with about 1,000 files with names such as YR1905-LIC12345-Smith,Harry-Brown,Mary. She would like to bring all of these filenames (not the files themselves) into a worksheet and separate the names at the dash. Thus, the example filename would actually occupy four cells in a single row. Carol figures this will take a macro to accomplish, but she's not sure how to access the filenames in that macro.
You can, of course, use a macro to do this, but you don't need to use a macro. You can, instead, use an old DOS-era trick to get what you need. At the command prompt (accessible through Windows: Start | All Programs | Accessories | Command Prompt), navigate until you are in the directory that contains the files. Then enter the following:
dir /b /a-d > filelist.txt
This creates a text file (filelist.txt) that contains a list of all the files within the current directory. Now, within Excel, you can follow these steps:
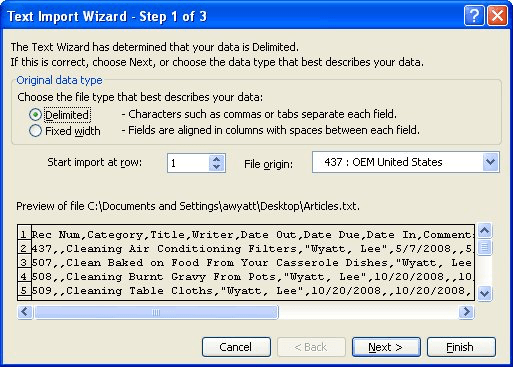
Figure 1. The Text Import Wizard.
The above steps are fairly easy to accomplish, particularly if you only need to get the file listing into Excel once in a while. If you need to do it more routinely, then you should probably seek a way to do it using a macro. The following macro will work very quickly:
Sub GetFileNames()
    Dim sPath As String
    Dim sFile As String
    Dim iRow As Integer
    Dim iCol As Integer
    Dim splitFile As Variant

    'specify directory to use - must end in "\"
    sPath = "C:\"

    iRow = 0
    sFile = Dir(sPath)
    Do While sFile <> ""
        iRow = iRow + 1
        splitFile = Split(sFile, "-")
        For iCol = 0 To UBound(splitFile)
            Sheet1.Cells(iRow, iCol + 1) = splitFile(iCol)
        Next iCol
        sFile = Dir     ' Get next filename
    Loop
End Sub
When you run the macro, make sure that there is nothing in the current worksheet. (Anything there will be overwritten.) Also, you should change the directory path that is assigned to the sPath variable near the beginning of the macro.
If you get an error when you run the macro, chances are good that you are using Excel 97. The Split function (used to break the filename apart at the dashes) was not added to VBA until Excel 2000. If you are using Excel 97, then you can use the following routine to emulate what the Split function does:
Function Split(Raw As String, Delim As String) As Variant
    Dim vAry() As String
    Dim sTemp As String
    Dim J As Integer
    Dim Indx As Integer

    Indx = 0
    sTemp = Raw
    J = InStr(sTemp, Delim)
    While J > 0
        Indx = Indx + 1
        ReDim Preserve vAry(1 To Indx)
        vAry(Indx) = Trim(Left(sTemp, J))
        sTemp = Trim(Mid(sTemp, J, Len(sTemp)))
        J = InStr(sTemp, Delim)
    Wend
    Indx = Indx + 1
    ReDim Preserve vAry(1 To Indx)
    vAry(Indx) = Trim(sTemp)
    Split = vAry()
End Function
Note:
ExcelTips is your source for cost-effective Microsoft Excel training. This tip (11143) applies to Microsoft Excel 97, 2000, 2002, and 2003. You can find a version of this tip for the ribbon interface of Excel (Excel 2007 and later) here: Pulling Filenames into a Worksheet.

Best-Selling VBA Tutorial for Beginners Take your Excel knowledge to the next level. With a little background in VBA programming, you can go well beyond basic spreadsheets and functions. Use macros to reduce errors, save time, and integrate with other Microsoft applications. Fully updated for the latest version of Office 365. Check out Microsoft 365 Excel VBA Programming For Dummies today!
Did you know that if you create a link that uses a UNC path, Excel could rewrite that path to something entirely ...
Discover MoreTracking down a problem that occurs with a single workbook can be vexing. One such problem occurred with Chris, and these ...
Discover MoreExcel provides different file formats you can use to export your worksheet information. One such file format is CSV, or ...
Discover MoreFREE SERVICE: Get tips like this every week in ExcelTips, a free productivity newsletter. Enter your address and click "Subscribe."
There are currently no comments for this tip. (Be the first to leave your comment—just use the simple form above!)
Got a version of Excel that uses the menu interface (Excel 97, Excel 2000, Excel 2002, or Excel 2003)? This site is for you! If you use a later version of Excel, visit our ExcelTips site focusing on the ribbon interface.
FREE SERVICE: Get tips like this every week in ExcelTips, a free productivity newsletter. Enter your address and click "Subscribe."
Copyright © 2026 Sharon Parq Associates, Inc.
 Please Note:
This article is written for users of the following Microsoft Excel versions: 97, 2000, 2002, and 2003. If you are using a later version (Excel 2007 or later), this tip may not work for you. For a version of this tip written specifically for later versions of Excel, click here:
Please Note:
This article is written for users of the following Microsoft Excel versions: 97, 2000, 2002, and 2003. If you are using a later version (Excel 2007 or later), this tip may not work for you. For a version of this tip written specifically for later versions of Excel, click here:
Comments