Please Note: This article is written for users of the following Microsoft Excel versions: 97, 2000, 2002, and 2003. If you are using a later version (Excel 2007 or later), this tip may not work for you. For a version of this tip written specifically for later versions of Excel, click here: Zooming With the Keyboard.
For most purposes, Excel allows you to issue commands and perform functions by using either the mouse or the keyboard. Unfortunately, Excel does not provide "equal access" for all commands. For instance, it is relatively easy to zoom in or out using the mouse, but there is no easy way to do it using the keyboard (other than using the keyboard to traverse the menus and select a zoom setting).
If you want the ability to zoom in or out easily using the keyboard, the only way to get it is to create a macro and then assign the macro to a keyboard combination. The following VBA macro (MyZoomIn) allow you to zoom in to (enlarge) a worksheet by 10%:
Sub MyZoomIn()
   Dim ZP As Integer
   ZP = Int(ActiveWindow.Zoom * 1.1)
   If ZP > 400 Then ZP = 400
   ActiveWindow.Zoom = ZP
End Sub
Notice that the macro only allows you to zoom in up to 400%. This is because Excel allows you to only zoom that high, and any higher would generate an error. A slight variation on the same theme results in a macro I call MyZoomOut. It zooms out of (reduces) a worksheet by 10%:
Sub MyZoomOut()
   Dim ZP As Integer
   ZP = Int(ActiveWindow.Zoom * 0.9)
   If ZP < 10 Then ZP = 10
   ActiveWindow.Zoom = ZP
End Sub
This macro sets the bottom boundary at 10%, which is the smallest you can go. Any smaller, and Excel would generate an error again.
The final trick to make these macros really useful is to assign them to a keyboard combination. You can then quickly zoom in or out by 10% with a simple keystroke. The following are the steps you can use to assign a macro to a keyboard combination:
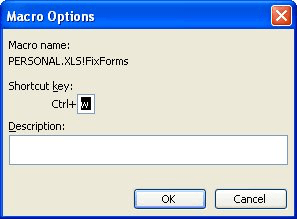
Figure 1. The Macro Options dialog box.
Note:
ExcelTips is your source for cost-effective Microsoft Excel training. This tip (2731) applies to Microsoft Excel 97, 2000, 2002, and 2003. You can find a version of this tip for the ribbon interface of Excel (Excel 2007 and later) here: Zooming With the Keyboard.

Excel Smarts for Beginners! Featuring the friendly and trusted For Dummies style, this popular guide shows beginners how to get up and running with Excel while also helping more experienced users get comfortable with the newest features. Check out Excel 2019 For Dummies today!
Different cultures have different conventions for displaying numbers and for parameters in Excel's worksheet functions. ...
Discover MoreUnderstanding how Excel sets the taskbars upon opening.
Discover MoreThe Help system built into Excel can be quite a lifesaver when you need to find that quick tidbit that is slipping your ...
Discover MoreFREE SERVICE: Get tips like this every week in ExcelTips, a free productivity newsletter. Enter your address and click "Subscribe."
2022-02-01 01:00:06
Ander
Alan, you're a genius. This is so helpful to us lonely types still using the pre-"ribbon" [shiver!] version of Excel. Thanks!
Got a version of Excel that uses the menu interface (Excel 97, Excel 2000, Excel 2002, or Excel 2003)? This site is for you! If you use a later version of Excel, visit our ExcelTips site focusing on the ribbon interface.
FREE SERVICE: Get tips like this every week in ExcelTips, a free productivity newsletter. Enter your address and click "Subscribe."
Copyright © 2026 Sharon Parq Associates, Inc.
 Please Note:
This article is written for users of the following Microsoft Excel versions: 97, 2000, 2002, and 2003. If you are using a later version (Excel 2007 or later), this tip may not work for you. For a version of this tip written specifically for later versions of Excel, click here:
Please Note:
This article is written for users of the following Microsoft Excel versions: 97, 2000, 2002, and 2003. If you are using a later version (Excel 2007 or later), this tip may not work for you. For a version of this tip written specifically for later versions of Excel, click here:
Comments