Written by Allen Wyatt (last updated September 17, 2022)
This tip applies to Excel 97, 2000, 2002, and 2003
Sometimes you may have a need to prevent changes to information in a particular worksheet in your workbook. For instance, you may want to send a worksheet to others for their review, but you don't want them changing the information or formulas in the worksheet.
Excel makes it very easy to protect one or more worksheets in any of your workbooks. You can do this by first specifying which cells in the worksheet should be protected, and then locking the worksheet.
Protection of your formulas or data is done on a cell-by-cell basis. This may seem odd, but it can be very handy. What it means is that you can protect all the cells in a worksheet, but leave the user input cells unprotected. When a user loads the worksheet, they can make changes to the user input values, see the calculations based on them, and get the information they need. The benefit to you is that you don't need to worry about users deleting information or changing formulas by mistake.
By default, cells are locked, pending your application of protection to the entire worksheet. What this means is that even though cells are locked, users can still change the cells unless you protect the worksheet, as described shortly.
If you want to change the condition of a particular cell so that it is not locked, you do so in this manner:
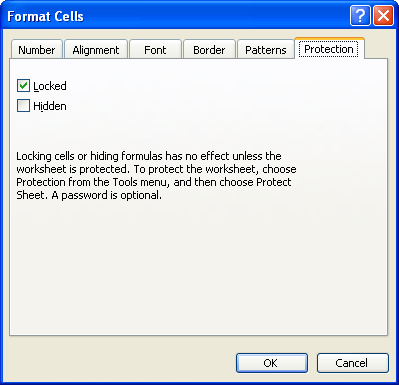
Figure 1. The Protection Tab of the Format Cells dialog box.
Once you have specified how you want the individual cells treated, you still need to protect the worksheet as a whole by locking it. This step can be viewed as a way to "turn the key" in the locks you put in place for each cell.
You do this by selecting the Protection option from the Tools menu. This displays a submenu from which you should select the Protect Sheet option. The result is the Protect Sheet dialog box. At the top of the dialog box you specify what should be protected. You have three choices:
At the bottom of the dialog box you can specify a password to be used for unlocking the worksheet. For maximum protection, you should use a password that is easy for you to remember, but would be difficult for others.
When you click your mouse on the OK button, what happens next depends on whether you specified a password. If you did not, the worksheet is immediately protected. If you did use a password you will see a dialog box asking you to again enter the password. This is a double-check to make sure you did not mistype the password the first time. When you click your mouse on OK in this dialog box, the worksheet is finally protected.
ExcelTips is your source for cost-effective Microsoft Excel training. This tip (1961) applies to Microsoft Excel 97, 2000, 2002, and 2003.

Program Successfully in Excel! This guide will provide you with all the information you need to automate any task in Excel and save time and effort. Learn how to extend Excel's functionality with VBA to create solutions not possible with the standard features. Includes latest information for Excel 2024 and Microsoft 365. Check out Mastering Excel VBA Programming today!
If you have a worksheet protected, it may not be immediately evident that it really is protected. This tip explains some ...
Discover MoreWant to stop other people from changing the names of your worksheets? You can provide the desired safeguard by using the ...
Discover MoreWhen you share a protected workbook with other people, you may not want them to get around the protection by creating a ...
Discover MoreFREE SERVICE: Get tips like this every week in ExcelTips, a free productivity newsletter. Enter your address and click "Subscribe."
There are currently no comments for this tip. (Be the first to leave your comment—just use the simple form above!)
Got a version of Excel that uses the menu interface (Excel 97, Excel 2000, Excel 2002, or Excel 2003)? This site is for you! If you use a later version of Excel, visit our ExcelTips site focusing on the ribbon interface.
FREE SERVICE: Get tips like this every week in ExcelTips, a free productivity newsletter. Enter your address and click "Subscribe."
Copyright © 2025 Sharon Parq Associates, Inc.
Comments