Please Note: This article is written for users of the following Microsoft Excel versions: 97, 2000, 2002, and 2003. If you are using a later version (Excel 2007 or later), this tip may not work for you. For a version of this tip written specifically for later versions of Excel, click here: Pulling Apart Cells.
It's probably happened to you before: you get data for your worksheet, and one of the columns includes names. The only problem is, the names are all bunched together. For instance, the cell contains "Allen Wyatt," but you would rather have the first name in one column, and the last name in the neighboring column to the right. How do you pull the names apart?
You can easily use the Text to Columns feature in Excel to pull your data apart. Just follow these steps:
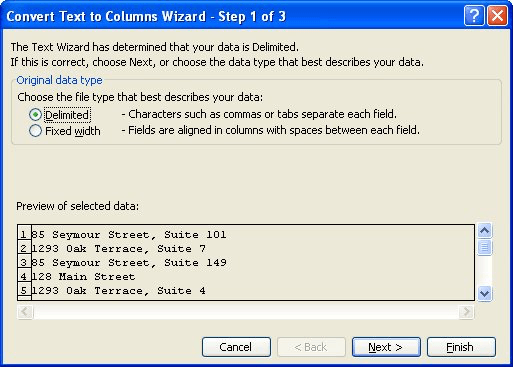
Figure 1. The beginning of the Convert Text to Columns Wizard.
Excel pulls apart the cells in your selected range, separating all the text at the delimiter you specified. Excel uses however many columns are necessary to hold the data.
If you don't want to spread your data completely across the columns, then you will need to use a macro. For instance, if a cell contains "John Davis, Esq.", then using the Text to Columns feature will result in the data being spread into three columns: the first containing "John", the second containing "Davis," (with the comma), and the third containing "Esq." If you would rather have the data split into two columns ("John" in one and "Davis, Esq." in the other, then the following macro will be helpful:
Sub PullApart()
    Dim FirstCol As Integer, FirstRow As Integer
    Dim RowCount As Integer
    Dim ThisRow As Integer
    Dim j As Integer, k As Integer
    Dim MyText As String

    FirstCol = ActiveWindow.RangeSelection.Column
    FirstRow = ActiveWindow.RangeSelection.Row
    RowCount = ActiveWindow.Selection.Rows.Count

    For j = 1 To RowCount
        ThisRow = FirstRow + j - 1
        MyText = Cells(ThisRow, FirstCol).Text
        k = InStr(MyText, " ")
        If k > 0 Then
            Cells(ThisRow, FirstCol + 1).Value = Mid(MyText, k + 1)
            Cells(ThisRow, FirstCol).Value = Left(MyText, k - 1)
        End If
    Next j
End Sub
This macro examines each cell and leaves everything up to the first space in the selected cell, and moves everything after the space into the column to the right. The only "gottcha" with this macro is to make sure you have nothing in the column to the right of whatever cells you select when you run it.
Note:
ExcelTips is your source for cost-effective Microsoft Excel training. This tip (2967) applies to Microsoft Excel 97, 2000, 2002, and 2003. You can find a version of this tip for the ribbon interface of Excel (Excel 2007 and later) here: Pulling Apart Cells.

Dive Deep into Macros! Make Excel do things you thought were impossible, discover techniques you won't find anywhere else, and create powerful automated reports. Bill Jelen and Tracy Syrstad help you instantly visualize information to make it actionable. You�ll find step-by-step instructions, real-world case studies, and 50 workbooks packed with examples and solutions. Check out Microsoft Excel 2019 VBA and Macros today!
VBA is a versatile programming language. It is especially good at working with string data. Here are the different VBA ...
Discover MoreGot too much information in a single cell? Here's how you can use a macro to pull apart that information and put it into ...
Discover MoreMacros are often used to process information in a worksheet. You may need your macro to change the values stored in ...
Discover MoreFREE SERVICE: Get tips like this every week in ExcelTips, a free productivity newsletter. Enter your address and click "Subscribe."
There are currently no comments for this tip. (Be the first to leave your comment—just use the simple form above!)
Got a version of Excel that uses the menu interface (Excel 97, Excel 2000, Excel 2002, or Excel 2003)? This site is for you! If you use a later version of Excel, visit our ExcelTips site focusing on the ribbon interface.
FREE SERVICE: Get tips like this every week in ExcelTips, a free productivity newsletter. Enter your address and click "Subscribe."
Copyright © 2026 Sharon Parq Associates, Inc.
 Please Note:
This article is written for users of the following Microsoft Excel versions: 97, 2000, 2002, and 2003. If you are using a later version (Excel 2007 or later), this tip may not work for you. For a version of this tip written specifically for later versions of Excel, click here:
Please Note:
This article is written for users of the following Microsoft Excel versions: 97, 2000, 2002, and 2003. If you are using a later version (Excel 2007 or later), this tip may not work for you. For a version of this tip written specifically for later versions of Excel, click here:
Comments