Kay wrote to describe a problem she was having with a template, a macro, and a toolbar button. It seems that Kay created a macro, saved it in the workbook, and assigned the macro to a toolbar button. When she later saved the workbook as a template, the toolbar button no longer worked properly if she deleted the original workbook.
When you create a macro, you have the opportunity to specify exactly where it should be stored. If you store it in a workbook and then later save the workbook as a template, the macro is still there because the workbook is converted to a template that contains all the original macros stored with the workbook.
The problem is with the toolbar button. When you create a toolbar button and assign a macro to it, Excel remembers where the macro is stored. When the workbook was originally created, the macro was stored in the workbook. This means that the toolbar button "points" to the macro in the workbook. Even after the workbook is saved as a template, the toolbar button still points to the macro in the workbook, not in the template.
To correct this situation, all you need to do is—after you save the workbook as a template—make sure you open the template and reassign macros to the toolbar buttons. These macros should be ones that reside in the template itself, not in any other workbook you have open at the time. You can then save the template and everything should work fine. You can reassign the macros by following these steps:
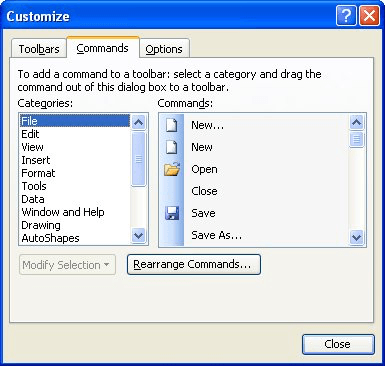
Figure 1. The Customize dialog box.
Note:
ExcelTips is your source for cost-effective Microsoft Excel training. This tip (2717) applies to Microsoft Excel 97, 2000, 2002, and 2003.

Dive Deep into Macros! Make Excel do things you thought were impossible, discover techniques you won't find anywhere else, and create powerful automated reports. Bill Jelen and Tracy Syrstad help you instantly visualize information to make it actionable. You�ll find step-by-step instructions, real-world case studies, and 50 workbooks packed with examples and solutions. Check out Microsoft Excel 2019 VBA and Macros today!
Want a quick way to convert positive values to negative and vice versa? You can create your own plus/minus button by ...
Discover MoreAs your macro is processing information, there will doubtless be times that it will need to compare information in ...
Discover MoreMacros give you a great deal of control over creating, finding, renaming, and deleting files. This tip focuses on this ...
Discover MoreFREE SERVICE: Get tips like this every week in ExcelTips, a free productivity newsletter. Enter your address and click "Subscribe."
There are currently no comments for this tip. (Be the first to leave your comment—just use the simple form above!)
Got a version of Excel that uses the menu interface (Excel 97, Excel 2000, Excel 2002, or Excel 2003)? This site is for you! If you use a later version of Excel, visit our ExcelTips site focusing on the ribbon interface.
FREE SERVICE: Get tips like this every week in ExcelTips, a free productivity newsletter. Enter your address and click "Subscribe."
Copyright © 2026 Sharon Parq Associates, Inc.
Comments